VSCodeにPHP用の拡張機能を導入しコーディングを快適にしましょう。拡張機能のインストール方法は最後に解説します。
Laravel編はこちら。
PHP Debug

VSCode上でXdebugを動かすことができるようになります。ブレークポイントを張ってステップ実行できるとデバッグが捗ります。
MAMPとVSCodeを使ったXdebugの使い方は下記のnote記事で解説していますので参考にしてみてください。

PHP Intelephense

コード補完や定義元へのコードジャンプ、クラスインポート等ができるようになります。PHPDocをしっかり書くと尚良いです。
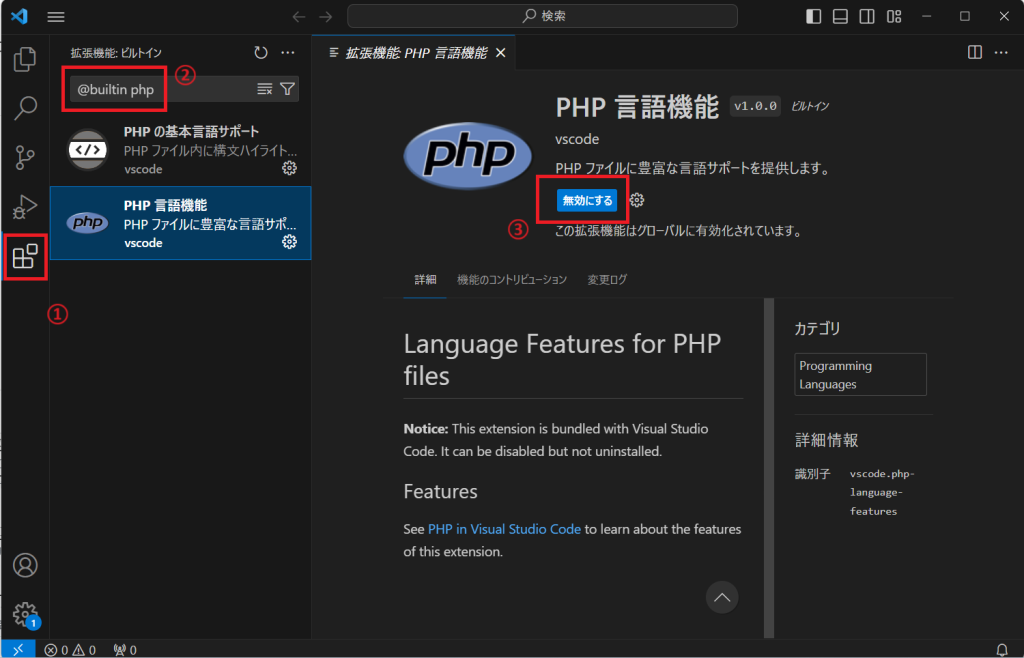
公式の説明にもある通り「Disable the built-in VSCode PHP Language Features.」もともと入っているVSCodeのPHP言語機能は無効化してください。
手順は下記の通りです。
- 「拡張機能」へ移動
- 検索バーに「@builtin php」と入力
- 「無効にする」ボタンをクリック

PHP DocBlocker

メソッド定義後のPHPDocの作成をサポートしてくれます。PHPDocとは関数やメソッドの上にアノテーションと呼ばれる「@~」から始まる特殊な記法で引数や戻り値の型を補足します。
使い方は簡単で、「/**」と入力した後にエンターキーを押すだけです。タイプヒンティングや戻り値の型指定があれば自動で読み取ってくれます。
<?php

class Chat
{
    /**
     * @var string
     */
    protected $message;

    /**
     * コンストラクタ
     *
     * @param string $message
     */
    public function __construct(string $message)
    {
        $this->message = $message;
    }

    /**
     * 受け取ったメッセージを返す
     *
     * @return string
     */
    public function getMessage(): string
    {
        return $this->message;
    }
}

/**
 * Chatクラスのインスタンスを返す
 *
 * @param string $message
 * @return Chat
 */
function makeChat(string $message): Chat
{
    return new Chat($message);
}

$chat = makeChat('hello world');
echo $chat->getMessage();
PHP import checker

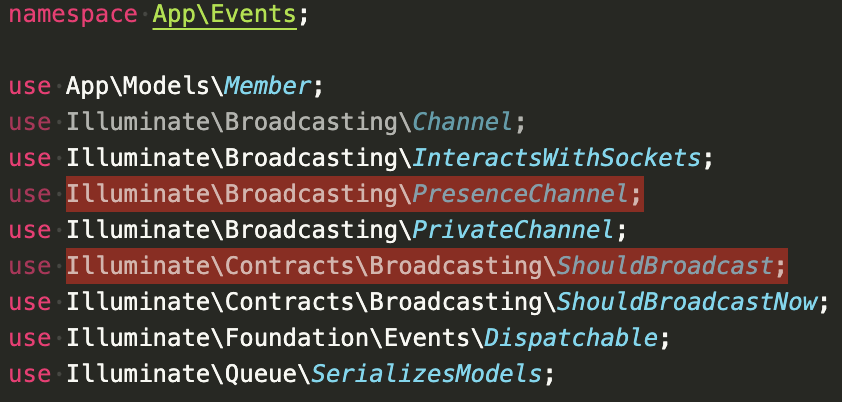
使用していないクラスのインポートをハイライトしてくれます。コードは綺麗に保ちたいものです。

拡張機能のインストール方法
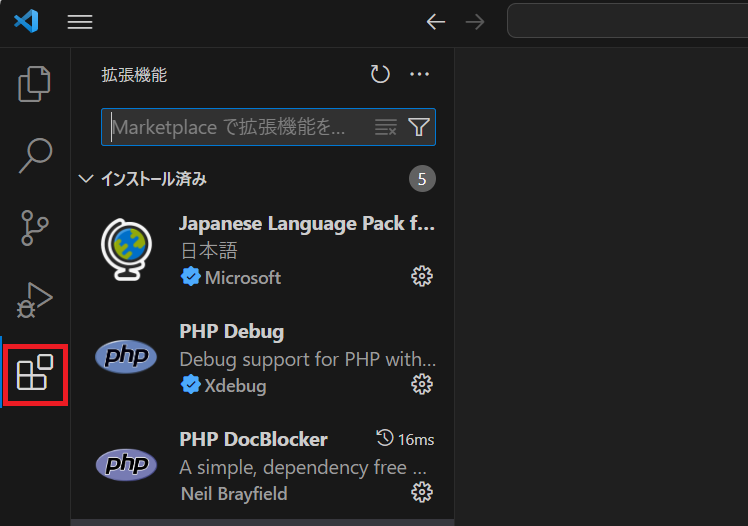
左サイドメニューの「拡張機能」アイコンをクリックしてください。

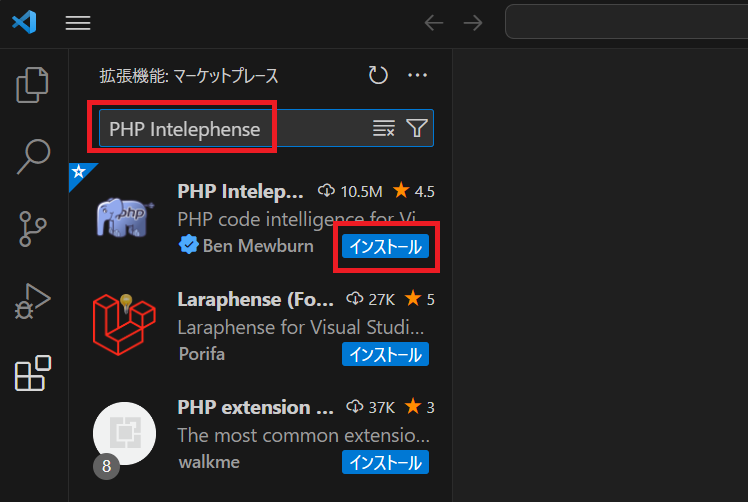
検索バーに導入したい拡張機能の名前を入力してください。リアルタイムに検索結果が表示されるので、目的の拡張機能の「インストール」ボタンをクリックしてください。拡張機能は自動で有効化されます。以上でインストールは完了です。

拡張機能のアンイストール方法
不要になった拡張機能を選択し、「アンインストール」ボタンをクリックしてください。

アンインストールせず無効にしたい場合は「アンインストール」ボタンの左横の「無効」ボタンをクリックしてください。
案件のご依頼・ご相談はコチラ


コメント